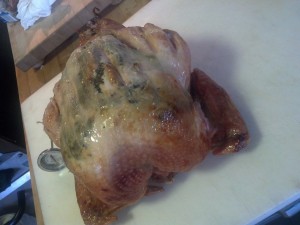
 My turkey roasting technique that is!!
I recently read a blog post by Darya Pino of Summer Tomato on How to Become a Great Cook Without Being a Chef. She’s right! You don’t need to be a chef to cook really good food. But, (and this is a big BUT sticking out) you do need a few of Chef’s techniques.
When I studied at the California Culinary Academy the focus was on learning technique, not so much on recipes. The philosophy is simple: If you understand how and when to incorporate each ingredient into a dish you can create your own recipes. And it is true!! By learning HOW to cook, not only was I able to create my own dishes, it became much easier to follow a recipe. Sounds silly I know, most recipes are well research and clearly written. Yet, when I incorporated my knowledge of cooking with say – Betty Crocker – goodness, the dish took on new textures and flavors.
It is this nuanced change that I am referring to when I say Upside Down and Backwards. Because that is exactly what I did. I roasted my turkey upside down and backwards. Follow me here, this is where it starts to get good.
The challenge for every cook on Thanksgiving is to cook the turkey making sure that the legs & thighs are cooked while keeping the breast meat from drying out and becoming stringy. Americas Test Kitchen performed a definitive study last year on turkey roasting trying all of the different roasting techniques and endorsed a good, albeit cumbersome, technique for preparing your bird: they cut the turkey into pieces and roasted the legs and thighs separately from the breast. Boo, I say. That takes away all of the fun of carving for dad!
I acknowledge the reasoning behind this approach but promise you one better. Actually FOUR better!! Now Darya Pino, this is where being a chef does make a difference. Chef Suzanne and I put our heads together determined to roast a turkey whole while keeping it moist and giving it great flavor . . . and we nailed it the first time out. Here’s what we did.
BRINING: Brining is a technique where the turkey is submerged in a saturated water mixture containing salt, sometimes sugar and oftentimes spices. It is a fun technique but takes time and refrigerator space. Sometime in the future I will share a recipe with you but for now I give you this short cut: Butterball. Yep, we bought a Butterball turkey simply because it was already brined. Butterball has been in business since before I gnawed on my first turkey leg and I trust their technique. I was not wrong then and I am not wrong now. Their birds are flavorful. But alas, I have had dry Butterballs before. So . . .
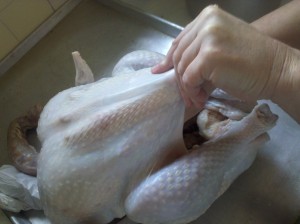 HERBED BUTTER: Here is a technique I just love. Suzanne and I took a half pound of soft butter and mixed in about 6 cloves of chopped garlic, salt and pepper to taste, and a small bunch each of Sage, Marjoram and Thyme chopped fine. We then loosened the skin covering the breast of the turkey and rubbed the Herbed Butter directly on to the meat. A lot of people will season the skin leaving the meat unadorned. I use this technique nearly every time I roast fowl. It always amazes!! I suggest that you thaw the bird the night before, pat it dry, rub in the herbed butter and leave it covered with plastic in the refrigerator overnight. Then it is all ready to pop in the oven on Thursday with a little extra flavor-infusing time.
UPSIDE DOWN: I like this technique a lot especially with turkeys because of their size. Bigger is better may be the American motto but it can play hell when roasting. Three factors come in to play when roasting: Time, Temperature and Gravity. With gravity being the only constant. Since I cannot change the effect of gravity I decided to use it to my advantage. I roasted my bird Up Side Down!! The effect was simple, all of the juices collected in the breast meat instead of the back of the bird. Yum!!
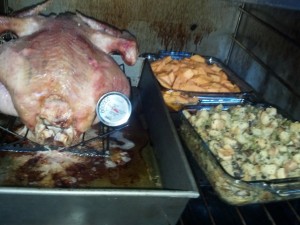 TIME & TEMPERATURE: Here’s the secret sword thrust of roasting. Start your turkey at 450° F. That’s right, low and slow works for BBQ meats that are full of collagen and you want to fall apart. Starting hot and fast . . . well . . . it’s better, that’s all. Actually this is how I understand what is happening. Collagen, the ‘moisture’ in the bird, is water soluble. In a slow oven, low temperature, the water temperature in the meat rises slowly and begins to drain from the meat carrying the collagen away with it, essentially drying out the meat. The longer the meat temperature stays at or near the boiling point of water the dryer the meat will become. Starting in a hot oven will push the meat temperature passed this mark more quickly leaving less time for the collagen to dissolve into the water.
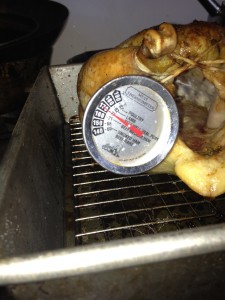
Here’s the trick behind the technique. Start your turkey, upside down in a rack, in a 450° F oven. Leave it there until the bird ‘starts talking to you.’ That is, until you can here the turkey snap, crackle and pop. About one half hour. Then turn the oven down to 325° F. About 2 hours in to the roasting process check the thigh meat with a meat thermometer. Your goal is 175 -180° F for the leg and thigh and 170° F for the breast. My 13 lb. bird took about 3 hours to cook completely through and MAN was it good.
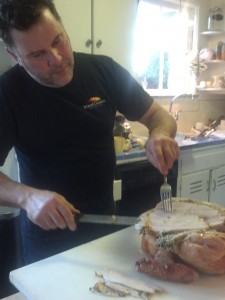 After the turkey reaches the desired internal remove it from the oven and let stand about 20 minutes before carving. Suzanne and I had great success with this bird. Both the white meat and dark meat were moist and flavorful.
I hope that your bird turns out as great as mine did. Stay tuned this week for Pan Gravy and Side Dish recipes.
Until then,
Eat Well and Smile Often!!
tj
p.s. I get two turkeys this year ;-)

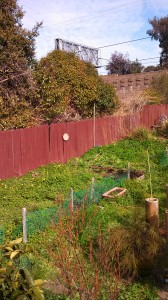
 The back half of my yard has always been covered with grass. For the first few years of living here I diligently watered, fertilized, weeded and mowed my little portion suburbia. It was lush, it was green and it soon became the place where the dogs went first thing in the morning. After learning that lawn fertilizer might cause cancer in dog paws and watching my water bill skyrocket every summer I took a hands off approach to lawn maintenance. In the ensuing years the pretty little Kentucky Bluegrass blades gave way to the hearty survivor species . . . Crabgrass. In truth, after a good rain and a trim, it looked pretty back there. Nice enough to sit by an open fire, enjoy a bottle of Malbec with some pan-fried brussel sprouts garnished with proscuitto and figs and pan deglazed with balsamic vinegar and maple syrup.
 So out it came, but not without a fight. I used a cool tool called a sod cutter to cut the grass right off of the soil. With the help of some handy men we removed all of the grass in a 50′ x 25′ section of the yard and set the cuttings aside to compost. Composting old lawn is not easy. It requires time and plastic. I am not optimistic but in for a penny . . .
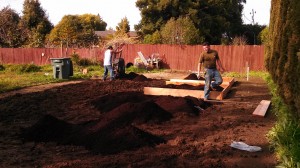 Ten yards of Clodbuster soil, 24 – 2″ x 10″ x 8′ boards and a box of galvanized 16 penny nails later my new planting beds were taking shape. With the addition of six 8′ x 8′ beds I have increased my planting are by 75%. I am not sure if I am crazy, excited or a little bit of both but I am looking forward to planting rows and rows of onions, carrots and celery. Mire poix vegetables for those of you in the know. As well as garlic, strawberries (not in the same planter), and four different types of potatoes.
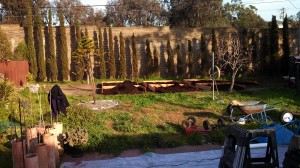 There will be growth in the spring I can promise you that . . . and a little more work but I am so looking forward to the fruits of my labor. Tomatoes are my favorite of all vegetables (technically a fruit but go with me here) with at least one bed will be dedicated to those magnificent Romas, and a sprinkling of heirlooms mixed in just for fun.
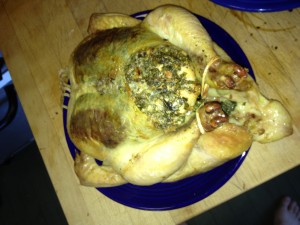 In this corner, weighing in at a plump 3 1/2 pounds the current heavy weight roasted chicken champion of the world: Madeline Kamman’s Herbed Butter under-the-skin.
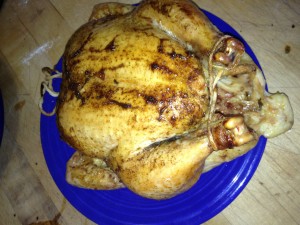 And in this corner, weighing in at a firm 3.25 pounds, the Contender, made-by-mom-at home Mahogany Chicken. The pride of the borough, this friendly approach to adding flavor should not be underestimated; stylish, smart and sassy. Who will be the winner is anyone’s guess. Kamman’s herbed champion has the breasts to put up a great fight. But The Mahogany contender has got the legs to run away with it all. Marquis of Queensbury rules apply!
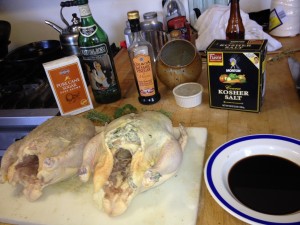 In the left corner prepped with just a rub of salt and pepper on the skin: The Mahogany Contender. In the right corner with an herbed butter rubbed under the skin directly on the breast: The Herbed Champion.
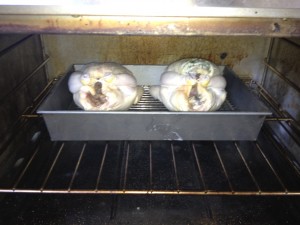 In the left side of the oven The Contender holds its own against The Champion. But don’t count out the slippery moves that Herbed Butter can bring to this fight. The heat is up for both of them and so far neither is backing down from a basting.
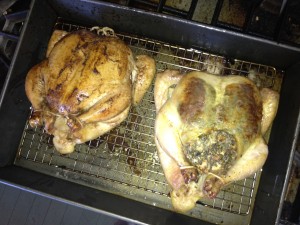 The final round and The Contender is putting on a show. Evenly browned after multiple bastings She’s showing no sign of legging off. The Champ, a little unevenly used from the butter directly under the skin, is still in the fight. Her delicious herbs giving off the airs of a true champion, one who never quits.
 I recently got called on my cooking BS.
 Now to the title of this piece and how Pilav became Pilaf. In 1533, at the age of fourteen, Catherine de Medici of Italy married Henry II, king of France. Henry, to our benefit you’ll soon discover, was much more interested in his mistress Diane de Poitiers than his new bride. Catherine as a result was excluded from politics and all things court like. Instead of staying by her husband’s side she traveled the country with her entourage. Here comes the good part. The Italians, being the great travelers and traders they are, brought back not only goods for commerce but great heaps of culture from around the globe. In Catherine’s entourage were chefs schooled in cross cultural cooking techniques and the dishes they inspired. As they progressed around France, Catherine chefs would require the assistance of local cooks to prepare the Queen’s meals. Catherine moved on but the cooking techniques remained, Pilaf included. While there has been some trifling debate as to whether Catherine actually had this much effect on French cuisine, those of us who study it can precisely time its rise to the Renaissance period. So there!