
 Thai Pumpkin Soup that is. Yep and you only thought Old Jack was good for pies, lattes and the ever seasonal decorative carving. No way Jose, the soup pot is wear my pumpkin landed, no stones required. With the reaction I received from serving this dish I am sure that fewer of my garden gourds will find their way to the porch.
Now my dear departed mother, a charming, intelligent, loving and talented woman could burn water . . . no really . . . I saw her do it once. That being said she did have a bit of baking streak in her and each holiday season she would bake pies for our larger family dinners: cousins, grandparents and hangers on. From an early age I remember shopping for groceries and helping out in the kitchen and quickly learned how to cook pasta, brown ground meat and boil blocks of frozen vegetables. Hey, it was a balanced diet!
One holiday season we were set on baking a pumpkin pie so I asked my mother, “How do I cut up the pumpkin for the pie?”

“No honey,” she replied, “We use a can.” (Sound of a vinyl record screeching to a stop in my head.)
“Oh” So I took the can from the cupboard and opened it. (I’m Helping!!)
We mixed milk and eggs and sugar and spices and about 2/3rds of the can of pumpkin into a bowl. Now here is where I get annoyed. It’s the same thing every year. We make a pumpkin pie, use 2/3rds of a can, and the rest stays in the refrigerator until enough time has passed for the ‘guilt of wasting’ to waste away. Then it gets thrown out ultimately to make room for the next remaining 1/3rd of a can of . . . whatever. The real pisser is that the recipe on the side of the can, for pumpkin pie, calls for 2/3rds of a can! Maybe we should have had pumpkin subsidies instead of corn?? I have no doubt we could make ethanol from left over Jack O’Lanterns and sell it at the Headless Horseman Gas Station . . . wait for it.

Enough of my childhood, let me Thai this up for you.
I’m not big on measurements but here is the gist of what I did.
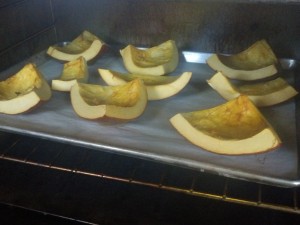
1 Pumpkin; small, cut, seeded and roasted until tender and slightly browned
Olive oil to saute
1/2 Onion; small, diced fine
2 cups of stocks (+ or -); vegetable or chicken as you prefer
1 Basil; small bunch, chopped
4 Red chilis; dried, seeded, chopped (reserve 1 for garnish)
1/2 cup – Cream of coconut (the thick stuff in the top of the cream of coconut milk can)
(stick the rest in the refrigerator until the guilt passes.)
1/2 cup (+ or -) heavy cream
Apple cider vinegar to taste
Salt to taste
Maple syrup and creme fraiche to garnish
In a large soup pot, sweat the onions in olive oil until clear, scoop the roasted pumpkin from the rind and place it with the onions. (You may not wish to use all of the pumpkin at this time. Reserve it for pie, lattes, muffins or to adjust soup consistency.) Add 1 cup of stock and bring to a boil. Take the pot off of the heat and let cool a minute while you set up your blender. (A blender works better than a food processor for making a smooth soup.) Ladle in equal parts of cooked vegetable and stock until the blender jar is half full. You want the solids to just be covered with liquid. Place the top on and start out on the slowest speed increasing speed every 5 seconds until the soup is smooth. Transfer to a large bowl until all of the vegetables are pureed. If you have more vegetable than liquid you can add more stock, cream and/or cream of coconut to maintain liquid/sold ratio. In the last jar to be blended, add 3 chopped chilis and the basil – blend.
Rinse the soup pot and return the puree to the pot and adjust consistency to a medium thickness. Heat until it just begins to boil, stirring regularly to avoid burning. Add salt and a small amount of vinegar to taste. Serve in cups or bowls and garnish with maple syrup, creme fraiche and diced chilis. Eat it up Yum!
Eat Well and Smile Often!!
tj
p.s. Headless Horseman . . . Horseless Carriage . . . gasoline . . .
Thank you for reading my blog and please click the Facebook recommend below.
 I am not a Master Chef but I am a pretty good cook with plans to open a pizza/bakery/fresh pasta establishment in the near future. To that end, I set to a recipe for homemade ravioli. To maintain a purist bent I went with a seasonal buttternut squash filling. Roasted squash, maple syrup, fresh nutmeg, a touch of cream, salt, pepper and a splash of apple cider vinegar just because. Very tasty indeed.
 I tried to mix the dough in my new Cuisinart food processor which sports a dough kneading feature. In Cuisinart’s DVD it works great with baguettes and soft doughs but not so much with this pasta recipe. So I took extra time and care running the dough through the pasta rollers, on the widest settings, until I got a smooth elastic sheet to make my raviolis. I would insert the dough into the rollers and collect it as it came out. After folding it into thirds I would would reintroduce the pasta to the rollers (Rollers – Pasta, Pasta – Rollers) at a 90° angle. I spent about half and hour running sheets through the rollers to get the right consistency. Next time I’ll use my mixer with a dough hook.


