
 My turkey roasting technique that is!!
I recently read a blog post by Darya Pino of Summer Tomato on How to Become a Great Cook Without Being a Chef. She’s right! You don’t need to be a chef to cook really good food. But, (and this is a big BUT sticking out) you do need a few of Chef’s techniques.
When I studied at the California Culinary Academy the focus was on learning technique, not so much on recipes. The philosophy is simple: If you understand how and when to incorporate each ingredient into a dish you can create your own recipes. And it is true!! By learning HOW to cook, not only was I able to create my own dishes, it became much easier to follow a recipe. Sounds silly I know, most recipes are well research and clearly written. Yet, when I incorporated my knowledge of cooking with say – Betty Crocker – goodness, the dish took on new textures and flavors.
It is this nuanced change that I am referring to when I say Upside Down and Backwards. Because that is exactly what I did. I roasted my turkey upside down and backwards. Follow me here, this is where it starts to get good.
The challenge for every cook on Thanksgiving is to cook the turkey making sure that the legs & thighs are cooked while keeping the breast meat from drying out and becoming stringy. Americas Test Kitchen performed a definitive study last year on turkey roasting trying all of the different roasting techniques and endorsed a good, albeit cumbersome, technique for preparing your bird: they cut the turkey into pieces and roasted the legs and thighs separately from the breast. Boo, I say. That takes away all of the fun of carving for dad!
I acknowledge the reasoning behind this approach but promise you one better. Actually FOUR better!! Now Darya Pino, this is where being a chef does make a difference. Chef Suzanne and I put our heads together determined to roast a turkey whole while keeping it moist and giving it great flavor . . . and we nailed it the first time out. Here’s what we did.
BRINING: Brining is a technique where the turkey is submerged in a saturated water mixture containing salt, sometimes sugar and oftentimes spices. It is a fun technique but takes time and refrigerator space. Sometime in the future I will share a recipe with you but for now I give you this short cut: Butterball. Yep, we bought a Butterball turkey simply because it was already brined. Butterball has been in business since before I gnawed on my first turkey leg and I trust their technique. I was not wrong then and I am not wrong now. Their birds are flavorful. But alas, I have had dry Butterballs before. So . . .
 HERBED BUTTER: Here is a technique I just love. Suzanne and I took a half pound of soft butter and mixed in about 6 cloves of chopped garlic, salt and pepper to taste, and a small bunch each of Sage, Marjoram and Thyme chopped fine. We then loosened the skin covering the breast of the turkey and rubbed the Herbed Butter directly on to the meat. A lot of people will season the skin leaving the meat unadorned. I use this technique nearly every time I roast fowl. It always amazes!! I suggest that you thaw the bird the night before, pat it dry, rub in the herbed butter and leave it covered with plastic in the refrigerator overnight. Then it is all ready to pop in the oven on Thursday with a little extra flavor-infusing time.
UPSIDE DOWN: I like this technique a lot especially with turkeys because of their size. Bigger is better may be the American motto but it can play hell when roasting. Three factors come in to play when roasting: Time, Temperature and Gravity. With gravity being the only constant. Since I cannot change the effect of gravity I decided to use it to my advantage. I roasted my bird Up Side Down!! The effect was simple, all of the juices collected in the breast meat instead of the back of the bird. Yum!!
 TIME & TEMPERATURE: Here’s the secret sword thrust of roasting. Start your turkey at 450° F. That’s right, low and slow works for BBQ meats that are full of collagen and you want to fall apart. Starting hot and fast . . . well . . . it’s better, that’s all. Actually this is how I understand what is happening. Collagen, the ‘moisture’ in the bird, is water soluble. In a slow oven, low temperature, the water temperature in the meat rises slowly and begins to drain from the meat carrying the collagen away with it, essentially drying out the meat. The longer the meat temperature stays at or near the boiling point of water the dryer the meat will become. Starting in a hot oven will push the meat temperature passed this mark more quickly leaving less time for the collagen to dissolve into the water.
Here’s the trick behind the technique. Start your turkey, upside down in a rack, in a 450° F oven. Leave it there until the bird ‘starts talking to you.’ That is, until you can here the turkey snap, crackle and pop. About one half hour. Then turn the oven down to 325° F. About 2 hours in to the roasting process check the thigh meat with a meat thermometer. Your goal is 175 -180° F for the leg and thigh and 170° F for the breast. My 13 lb. bird took about 3 hours to cook completely through and MAN was it good.
 After the turkey reaches the desired internal remove it from the oven and let stand about 20 minutes before carving. Suzanne and I had great success with this bird. Both the white meat and dark meat were moist and flavorful.
I hope that your bird turns out as great as mine did. Stay tuned this week for Pan Gravy and Side Dish recipes.
Until then,
Eat Well and Smile Often!!
tj
p.s. I get two turkeys this year ;-)
 Mashed potatoes and stuffing!! Are you freaking kidding me?? Why are we not eating these with every meal??
 Ah the heck with it, it’s Thanksgiving and I for one, like every good American, plan to overindulge this holiday season. This means that multiple helpings of mashed potatoes and stuffing will make it off of my plate, on to my fork and into my head. Fork one, napkin two, fork one, napkin two.
 Place diced potatoes in a sauce pan with enough cold water to cover. Add 1 tablespoon salt, place on high heat and bring to a gentle boil. Cook for about 15 minutes checking with a fork for doneness regularly. (Yes, doneness is a word.) Place a clean colander in an empty sink.
 The potatoes should just yield to the pressure of a fork. Take the pot off of the heat and pour potatoes and water through the colander. Return the potatoes and place back on the stove on high heat for one minute to boil off any excess fluid.
 Turn the heat off and with a mashing tool mash the potatoes until the lumps are gone. With a whisk begin whipping the potatoes. Add the sour cream and butter and whip until the potatoes are smooth in texture. Do not over whip. This will make the potatoes gluey.
 Add salt and white pepper and extra butter to taste. Place in an oven proof dish, cover and place in warm oven to keep while your turkey is standing.
 In a sauce pan place butter, olive oil and garlic. Heat over medium heat until butter starts to bubble. In a large bowl toss garlic butter and diced English Muffins. Place onto a baking sheet and place baking sheet in to a preheated 350° F oven. Bake until browned about 30 minutes. (This part can be done the day before with no loss of quality.) (You might want to double this part of the recipe and put the croutons out for snacks . . . damn good!!)
 In a clean saute’ pan place 2 T of olive oil and place on medium high heat. When the oil begins to shimmer add the diced onion and celery. Stir and/or toss to cook slightly. After about 5 minutes add the mushrooms and the herbs and stir. Let cook for one minute then add the chicken broth. Simmer over medium heat for about 5 minutes then remove from heat.
 In a large mixing bowl mix the croutons and the vegetable mixture with broth. Place the moistened croutons in to a baking dish and bake for 1 hour at 350° F. Serve and enjoy!!
 Ah! The magic of Thanksgiving lies not in the gratitude we openly express for life’s gifts, large or small. No, no, no . . . the magic lies in the GRAVY!!
 After you have taken the bird from the oven, remove it to a dish or cutting board to stand for about 15 – 20 minutes before carving. This is the time to knock out ‘Le Piece de Resistance’ of the meal: the pan gravy. Start by placing the pan across one or two burners of your stove and turn them on low. Just enough that the fat and juices begin to bubble. For my 13lb turkey recipe there were enough drippings from the bird and the herbed butter to need about 2/3 cup of flour to thicken. This is a judgment call on the cook’s part.
 Whisk the flour and all of the drippings together over the low heat and cook the roux until it bubbles and gets a little fluffy, stirring occasionally to even out the cooking. This process literally opens up the starch in the flour and allows it to absorb more liquid than when it is raw. While the roux is cooking, place some chicken broth in a separate saucepan and bring it to a gentle boil. If I could find a commercial source for turkey broth I would have used that. In the restaurant there were always turkeys being roasted for sandwiches and we would save the bones and make a stock from them. Chicken or turkey, both add great flavor. I used a 32 oz container of unsalted broth and made one quart of gravy . . . almost enough!
 After the roux has cooked sufficiently, about 5 minutes, turn off the heat and let it cool for about one minute. Then gently ladle in one-ladle-full of boiling broth and whisk together well. After it has fully incorporated repeat this step 3 or 4 more times. Turn the heat back on low under the pan to cook the gravy while whisking. Having hot broth and a little bit of patience whisking it in will give you a smooth gravy, the envy of every wanna-be sauce make out there. Turn the heat off under the broth and now you can start pouring it in to the pan in greater volumes whisking until fully incorporated each time. Heat the gravy for about 2 minutes while whisking then turn the heat off under the pan and serve.
 Since I used a brined turkey my drippings were already salted. My mother would add some Worcestershire sauce for extra spice. (Fair Notice: I had to grab a bottle from the refrigerator in order to spell it correctly.) I simply stuck a spoon into the gravy then into my head and tasted it. Lovely!! As you see in the picture above it went extremely well with my snack of mashed potatoes.
 Check back Wednesday for the final installment of Thanksgiving recipes.
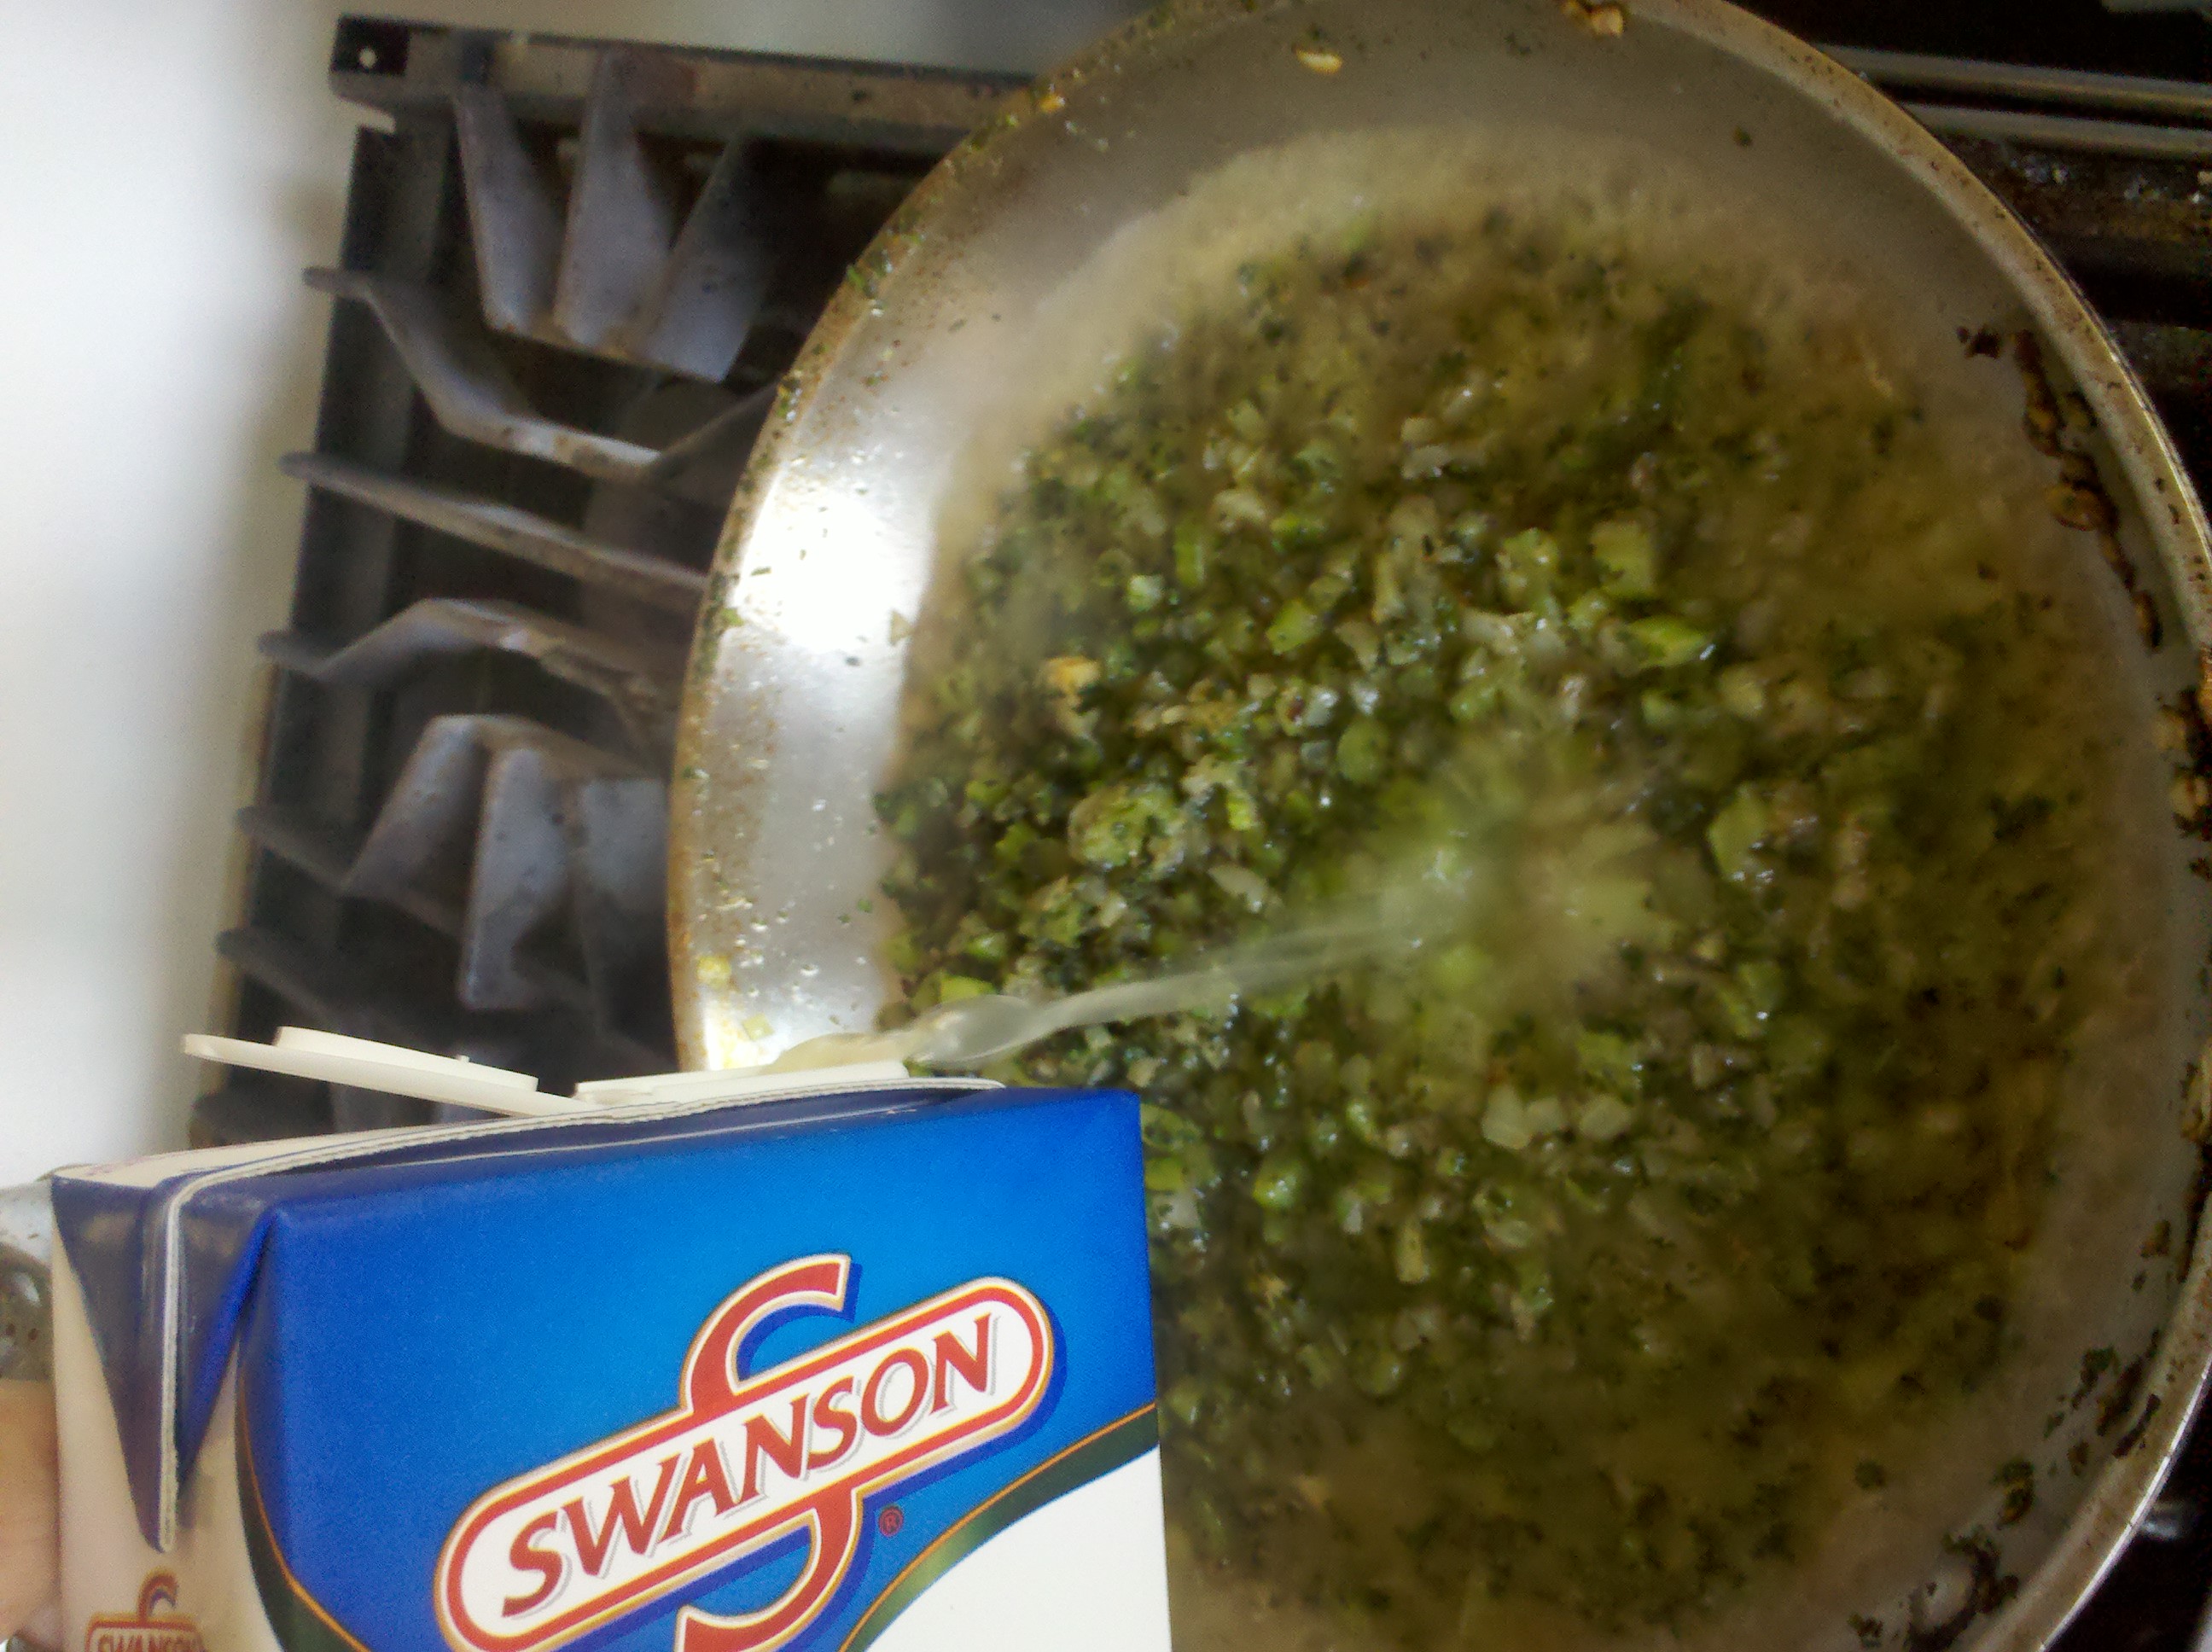