
 I love bread. I love bread with butter. I love bread with olive oil . . . and balsamic vinegar!! I love bread with cheese. I love bread with cheese and tomatoes and basil!! I like bread in rolls. I like bread in loaves. I like to slice it, dice it, rip it and chew it. I like it as the bookends of my sandwich or as a crusty chunk in my soup. I like it for breakfast, for lunch and for dinner. I like it when I am hungry and even when I am not!! I like to toast it, soak it, dip it and fry it. Almost any way I can fix it I will try it!!
Bread is an amazing food. The cultivation of wheat marks the change in man from nomadic to agrarian. After always being on the hunt or following the herd, Mankind finally settled down in one spot and began the practice of cultivation. Of all the grasses and grains our European forefathers came across wheat became the preferred staple. The ability for wheat and flour to be stored over the non-producing seasons allowed families to provide themselves with calories and nourishment while the next crop grew. Bread, at that time, was literally the stuff of life.
Bread for me IS the stuff of life. (That and beer. It must be the yeast that they have in common.) Recently I purchased new food processor and discovered that it has a setting for Dough. Being the culinary purist that I am it took about . . . a second . . . for me to think, “Cool! No more kneading.” For those of you who make, or have made, there own bread you will empathize with my next sentiment. It takes a lot of work to make a loaf of bread!
Sure we have great recipes available to us and all the ingredients we need are on the shelves of the local grocery store. So why do not we make our breads? Homemade bread tastes WAY better, in most cases. Simple answer: (You guessed it.) Effort. It takes a lot of work to make a loaf of bread. For a while bread machines were all the craze but honestly . . . who wants to eat a cylindrical loaf of bread. There is something about those hand wrought loaves that are more appealing. I even purchased the heavy duty Kitchen Aid mixer with a dough hook so I could bake bread more often. But I have found that it isn’t strong enough to knead stiff doughs and it stripped a gear with my last effort.
So when I saw how easy it was to use the food processor I jumped at the chance to try it out. It was very simple with only a few detail points to consider. First, I did not need to proof the yeast. It simply got mixed in with the flour. Second, all of the dry ingredients get mixed in the bowl and the water is slowly drizzled in as the processor . . . processes. The only consideration was measuring the temperature of the flour and water with an instant read thermometer. I spent five minutes mixing and kneading the dough. After that, it only took a little forming and some patience. I did find that I needed to schedule my day around the rising periods but in the end the amount of effort expended was well invested as the results were superb!!
There was something very satisfying about having my house smell of freshly baked bread. I knocked back one of the loaves with tomatoes, mozzarella, basil, olive oil and balsamic vinegar. Another succumbed to rips and grabs. The third I wrapped and gifted. If you find a little extra time one day consider knocking out a loaf . . . the easy way.
Eat Well and Smile Often!!
tj
p.s. Hmm . . . maybe I should try a Ciabatta next??
 Mashed potatoes and stuffing!! Are you freaking kidding me?? Why are we not eating these with every meal??
 Ah the heck with it, it’s Thanksgiving and I for one, like every good American, plan to overindulge this holiday season. This means that multiple helpings of mashed potatoes and stuffing will make it off of my plate, on to my fork and into my head. Fork one, napkin two, fork one, napkin two.
 Place diced potatoes in a sauce pan with enough cold water to cover. Add 1 tablespoon salt, place on high heat and bring to a gentle boil. Cook for about 15 minutes checking with a fork for doneness regularly. (Yes, doneness is a word.) Place a clean colander in an empty sink.
 The potatoes should just yield to the pressure of a fork. Take the pot off of the heat and pour potatoes and water through the colander. Return the potatoes and place back on the stove on high heat for one minute to boil off any excess fluid.
 Turn the heat off and with a mashing tool mash the potatoes until the lumps are gone. With a whisk begin whipping the potatoes. Add the sour cream and butter and whip until the potatoes are smooth in texture. Do not over whip. This will make the potatoes gluey.
 Add salt and white pepper and extra butter to taste. Place in an oven proof dish, cover and place in warm oven to keep while your turkey is standing.
 In a sauce pan place butter, olive oil and garlic. Heat over medium heat until butter starts to bubble. In a large bowl toss garlic butter and diced English Muffins. Place onto a baking sheet and place baking sheet in to a preheated 350° F oven. Bake until browned about 30 minutes. (This part can be done the day before with no loss of quality.) (You might want to double this part of the recipe and put the croutons out for snacks . . . damn good!!)
 In a clean saute’ pan place 2 T of olive oil and place on medium high heat. When the oil begins to shimmer add the diced onion and celery. Stir and/or toss to cook slightly. After about 5 minutes add the mushrooms and the herbs and stir. Let cook for one minute then add the chicken broth. Simmer over medium heat for about 5 minutes then remove from heat.
 In a large mixing bowl mix the croutons and the vegetable mixture with broth. Place the moistened croutons in to a baking dish and bake for 1 hour at 350° F. Serve and enjoy!!
 Ah! The magic of Thanksgiving lies not in the gratitude we openly express for life’s gifts, large or small. No, no, no . . . the magic lies in the GRAVY!!
 After you have taken the bird from the oven, remove it to a dish or cutting board to stand for about 15 – 20 minutes before carving. This is the time to knock out ‘Le Piece de Resistance’ of the meal: the pan gravy. Start by placing the pan across one or two burners of your stove and turn them on low. Just enough that the fat and juices begin to bubble. For my 13lb turkey recipe there were enough drippings from the bird and the herbed butter to need about 2/3 cup of flour to thicken. This is a judgment call on the cook’s part.
 Whisk the flour and all of the drippings together over the low heat and cook the roux until it bubbles and gets a little fluffy, stirring occasionally to even out the cooking. This process literally opens up the starch in the flour and allows it to absorb more liquid than when it is raw. While the roux is cooking, place some chicken broth in a separate saucepan and bring it to a gentle boil. If I could find a commercial source for turkey broth I would have used that. In the restaurant there were always turkeys being roasted for sandwiches and we would save the bones and make a stock from them. Chicken or turkey, both add great flavor. I used a 32 oz container of unsalted broth and made one quart of gravy . . . almost enough!
 After the roux has cooked sufficiently, about 5 minutes, turn off the heat and let it cool for about one minute. Then gently ladle in one-ladle-full of boiling broth and whisk together well. After it has fully incorporated repeat this step 3 or 4 more times. Turn the heat back on low under the pan to cook the gravy while whisking. Having hot broth and a little bit of patience whisking it in will give you a smooth gravy, the envy of every wanna-be sauce make out there. Turn the heat off under the broth and now you can start pouring it in to the pan in greater volumes whisking until fully incorporated each time. Heat the gravy for about 2 minutes while whisking then turn the heat off under the pan and serve.
 Since I used a brined turkey my drippings were already salted. My mother would add some Worcestershire sauce for extra spice. (Fair Notice: I had to grab a bottle from the refrigerator in order to spell it correctly.) I simply stuck a spoon into the gravy then into my head and tasted it. Lovely!! As you see in the picture above it went extremely well with my snack of mashed potatoes.
 Check back Wednesday for the final installment of Thanksgiving recipes.
 “Tell me what you eat, and I will tell you what you are.”
 The oyster meat, for those of you who are unfamiliar with it, is located at the point where the thigh connects to the body of the turkey. I recommend removing the legs and thighs first by cutting through the joints. Flip the bird gently on to its breast and just above the point where the thighbone was connected to the body, there will be a small ‘oyster’ shaped piece of flesh that is very flavorful. My suggestion: Don’t tell any of your guests and save it for leftovers.
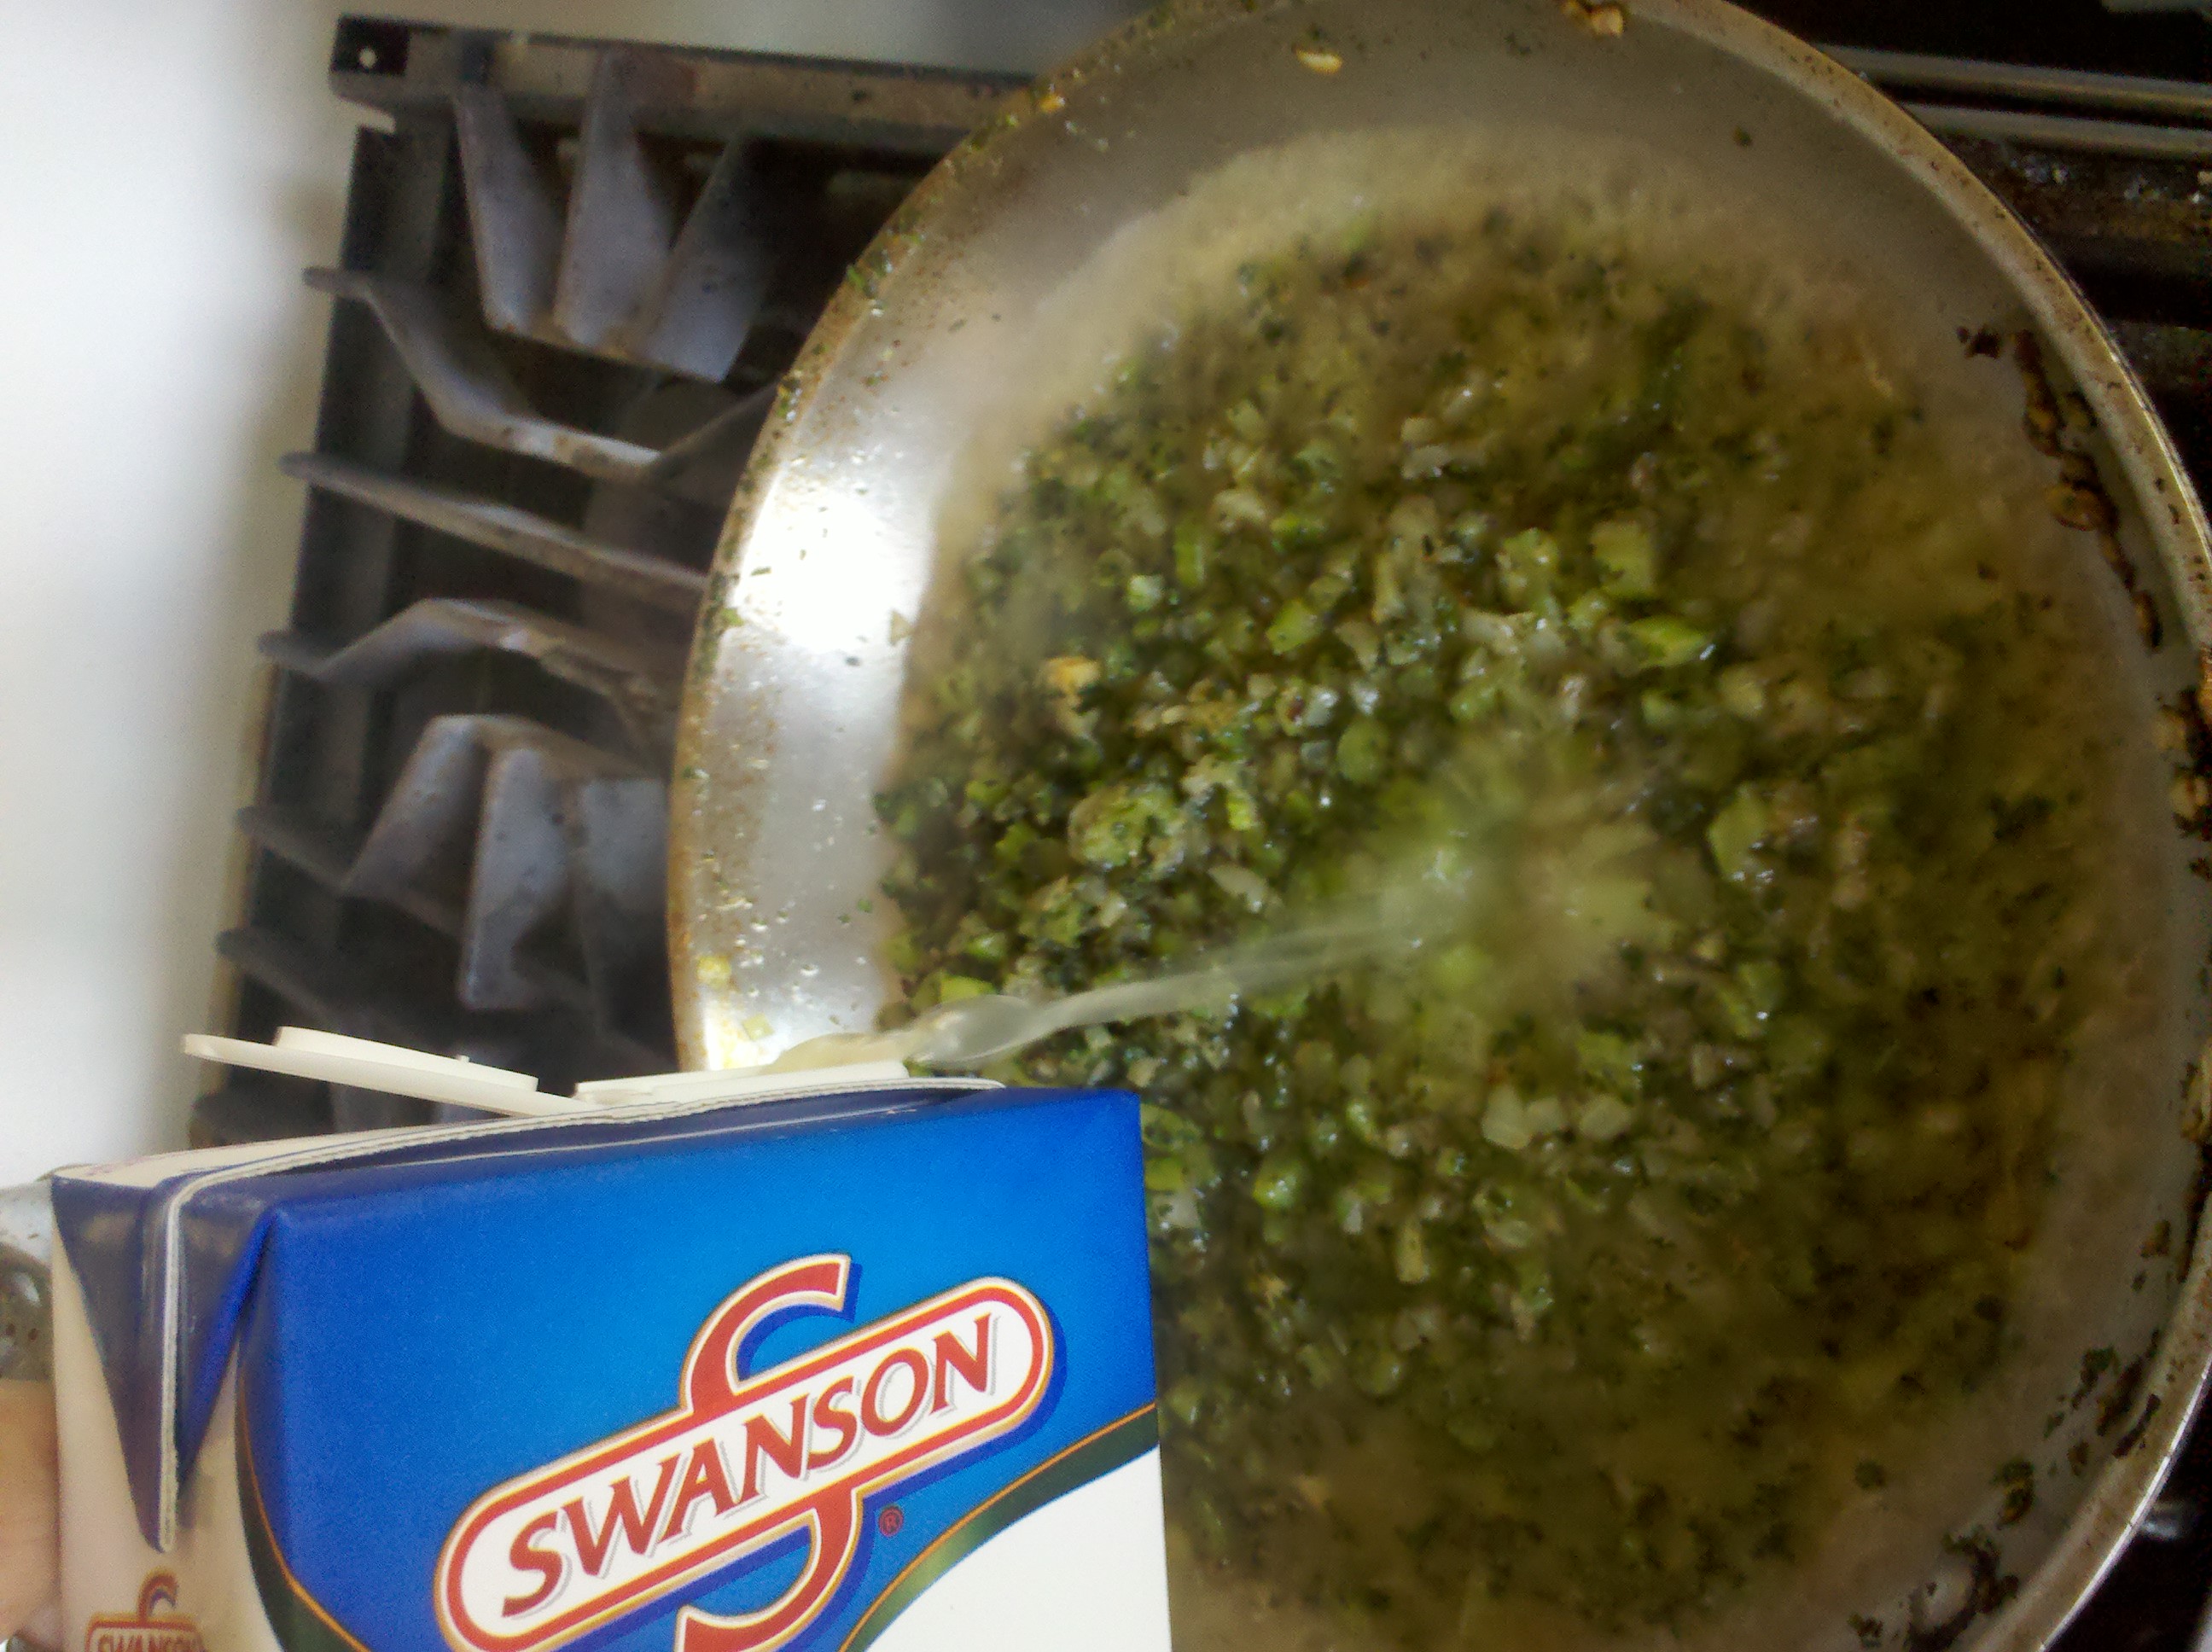